Before you begin
You’ll need:- Admin access to your Windmill account
- Admin access to your identity provider (Okta, Microsoft Entra ID, etc.)
Configure SAML SSO
Go to Settings > Security to begin the SSO setup wizard.1
Copy your SP metadata
Windmill displays your Entity ID (Audience URI), ACS URL, and Login URL. Copy these values into your identity provider’s SAML application settings, or click Download SP Metadata XML to download the metadata file.The wizard also shows the expected attribute mappings (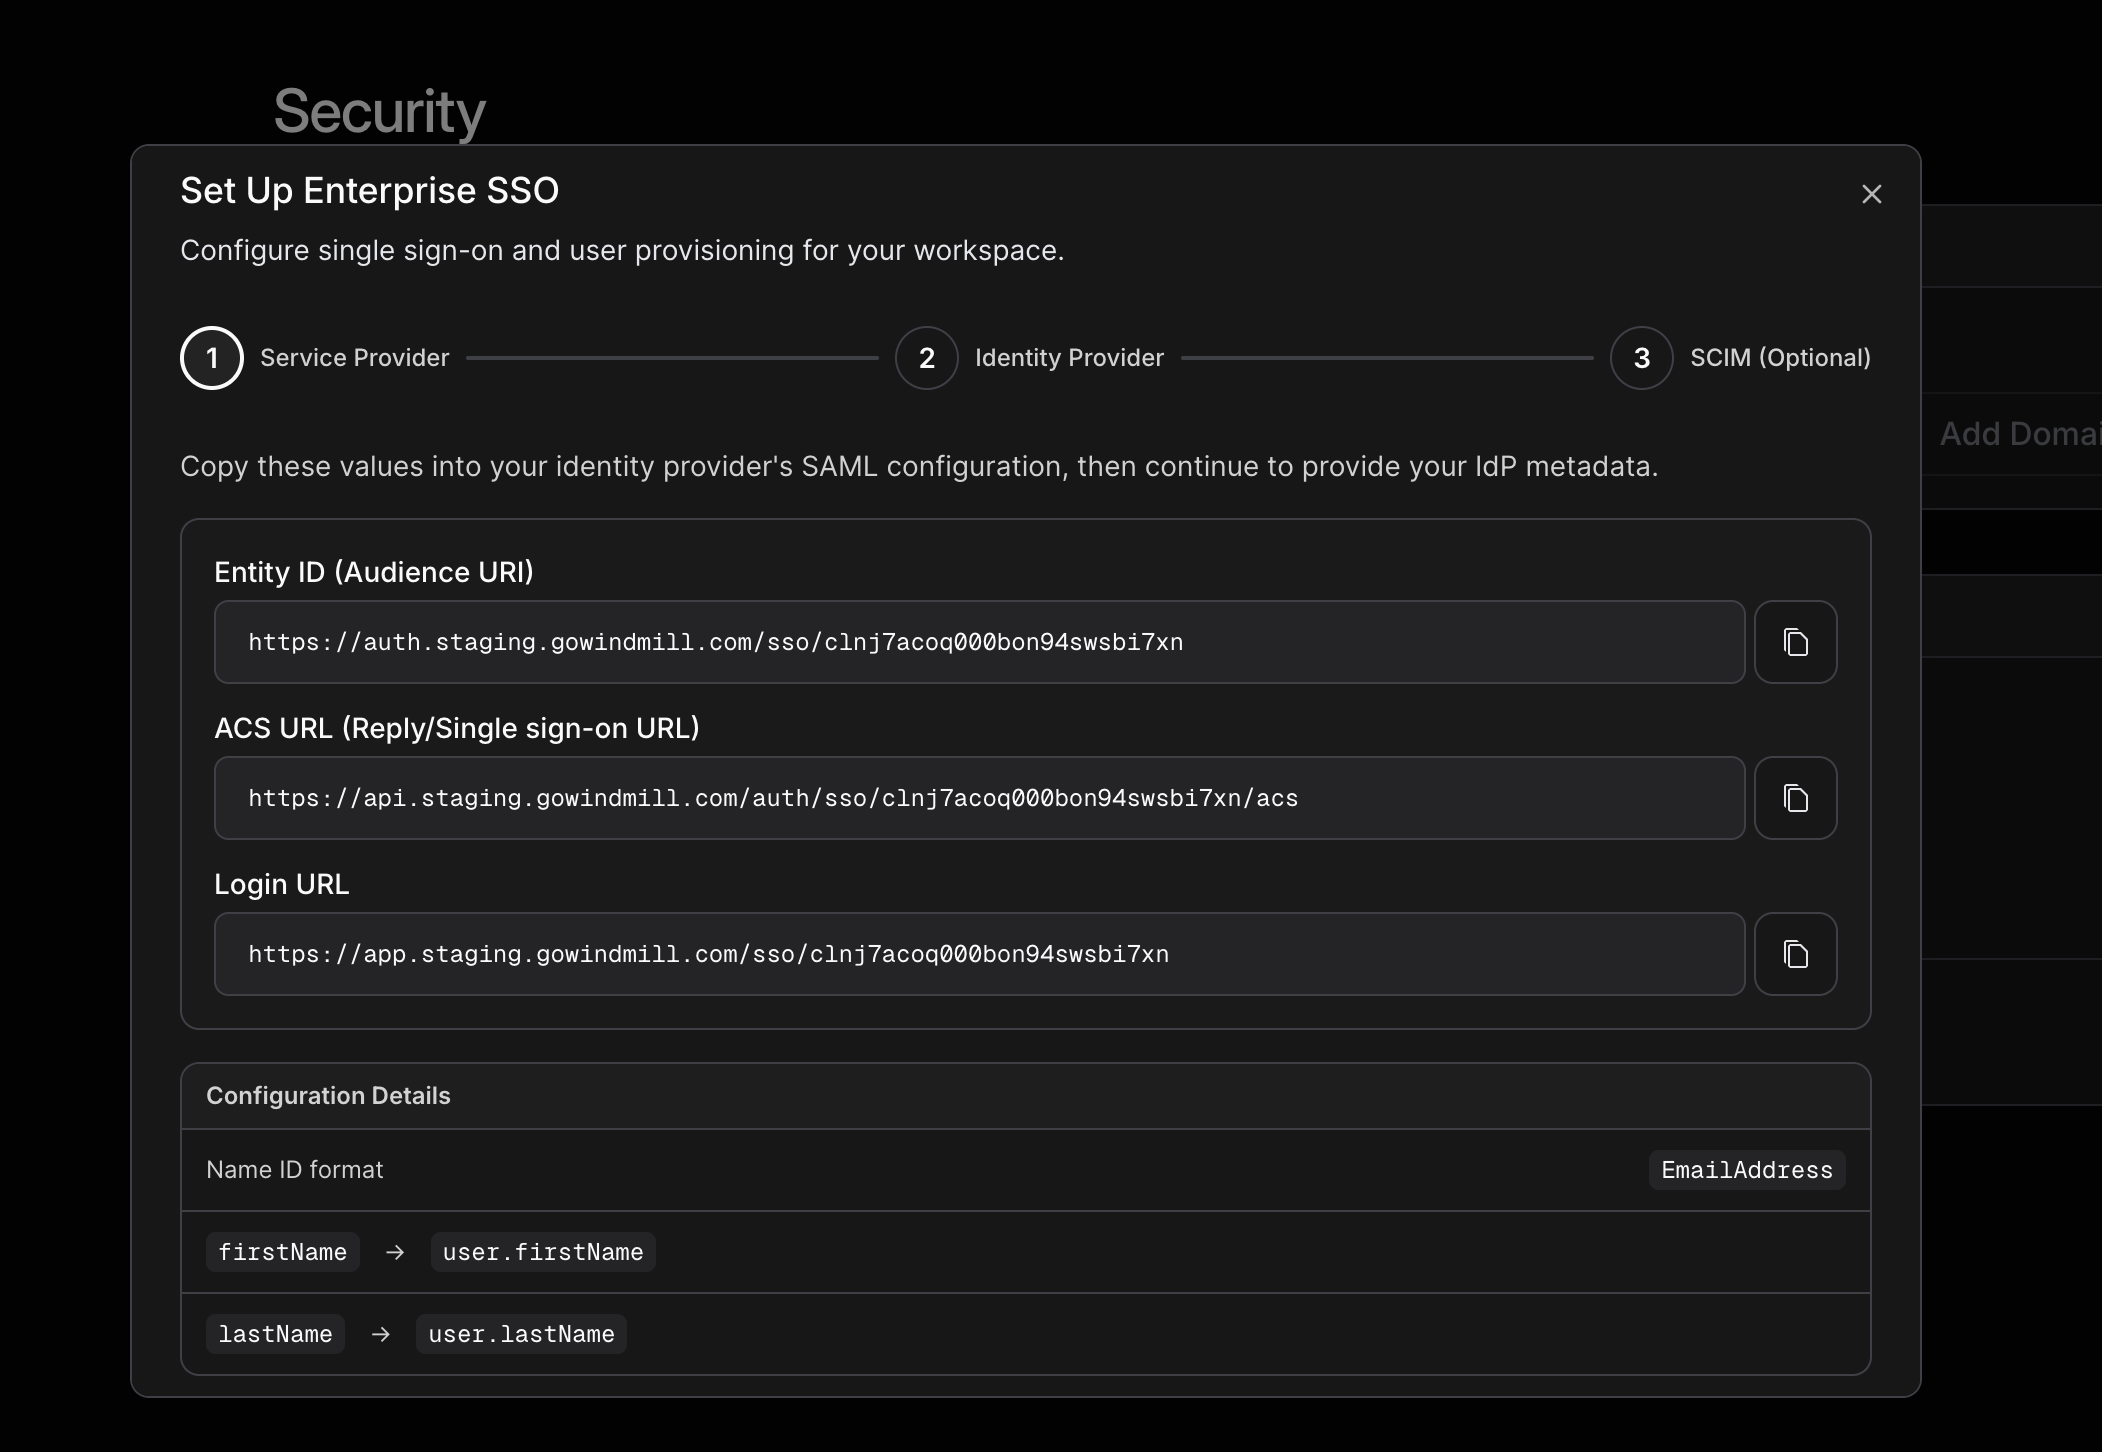
firstName → user.firstName, lastName → user.lastName) and the Name ID format (EmailAddress).2
Provide your IdP metadata
After configuring your identity provider, provide your SAML metadata so Windmill can recognize authentication requests. You can either paste a metadata URL or upload the XML directly.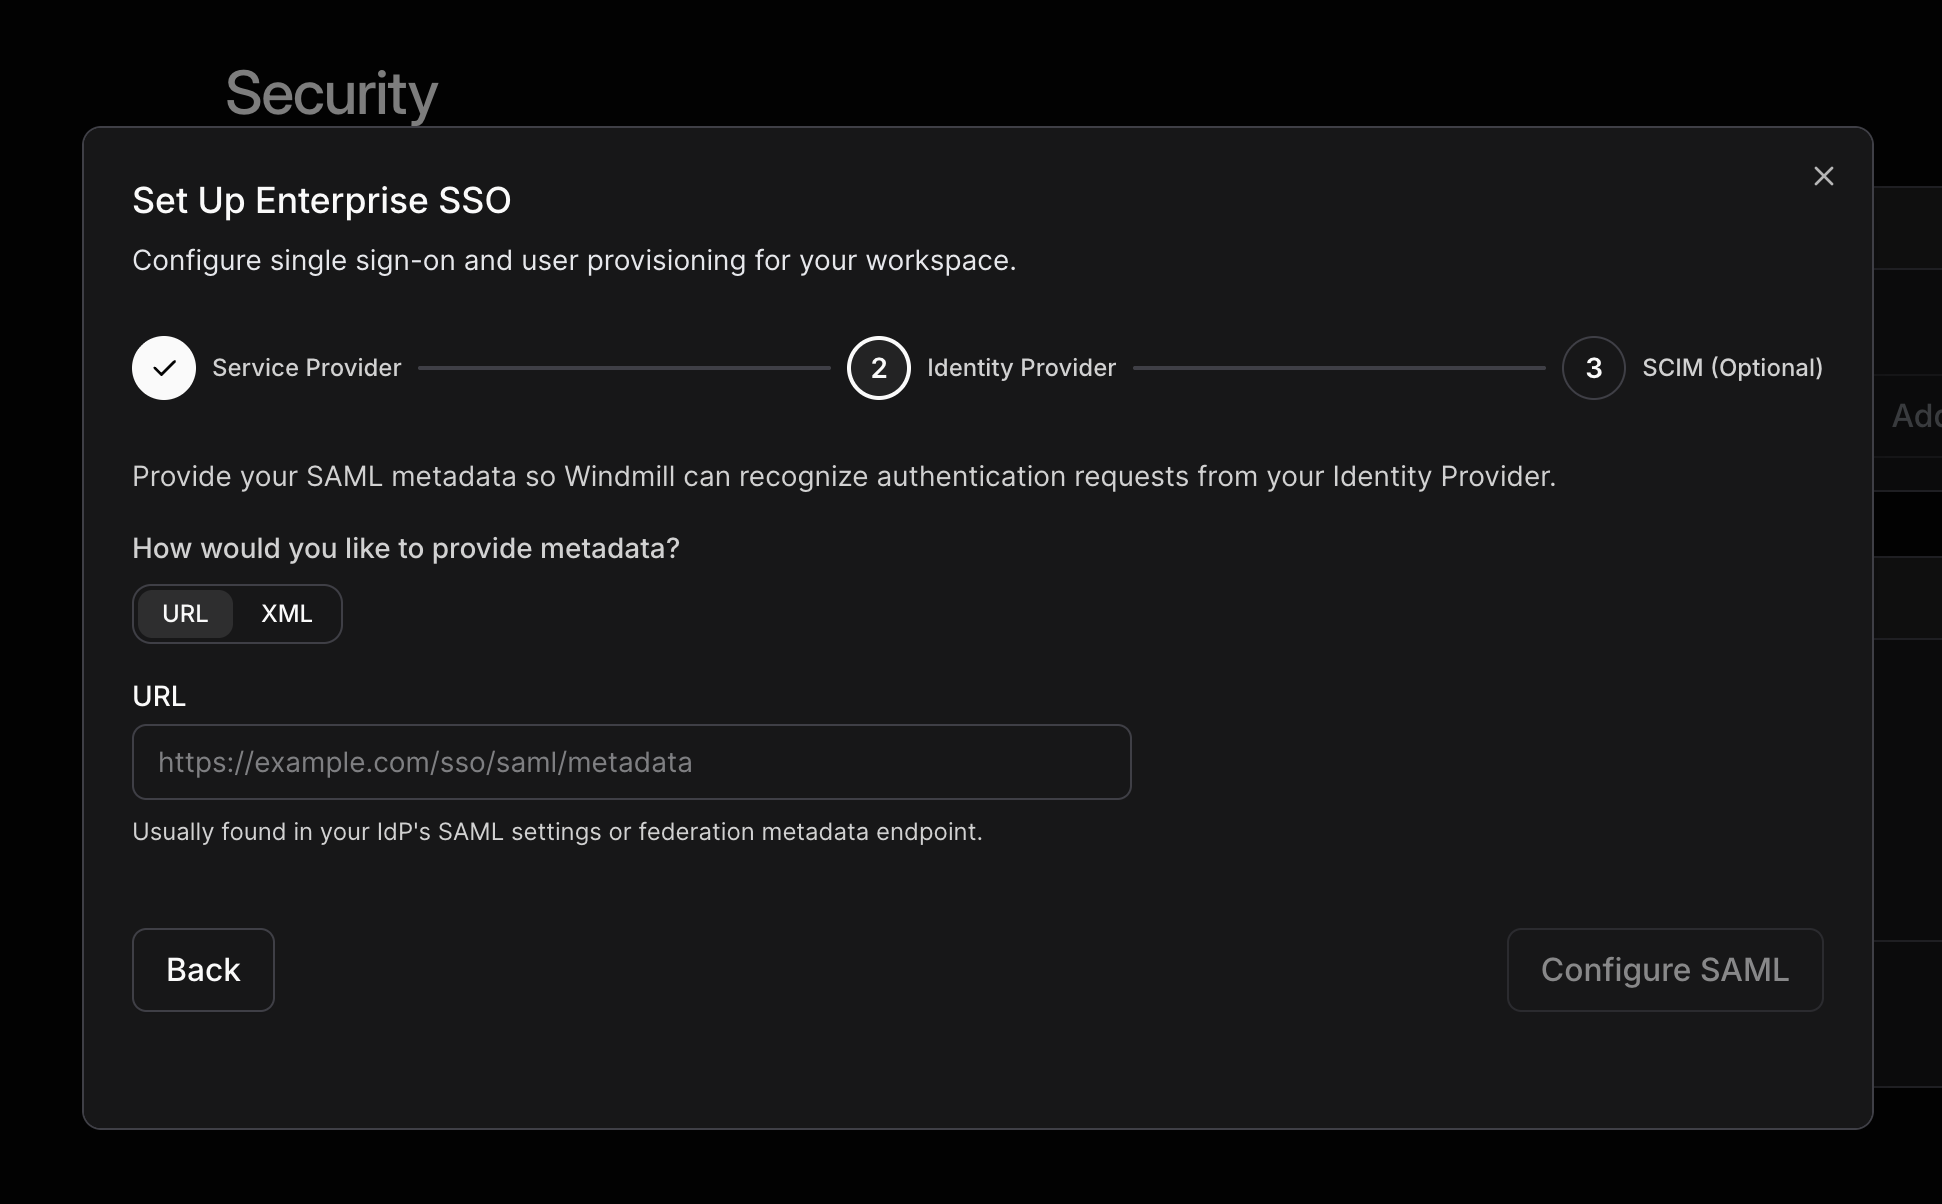
3
Test your SSO connection
Click Test SSO to verify the connection. You’ll be redirected to your identity provider to authenticate. On success, you’ll see a confirmation in Windmill.
Activate SSO
Once you activate SSO, it’s enforced for all users. Google and Microsoft social login will be disabled. There is no fallback—if your identity provider goes down or SSO is misconfigured, no one (including admins) can log in until the issue is resolved. Test thoroughly before activating.

Configure SCIM (optional)
SCIM (System for Cross-domain Identity Management) automates user provisioning and group sync from your identity provider. SCIM requires SSO to be active before it can be enabled.1
Generate a SCIM token
In Settings > Security, generate a SCIM bearer token. Windmill displays the Secret Token and Tenant URL you’ll need for your identity provider.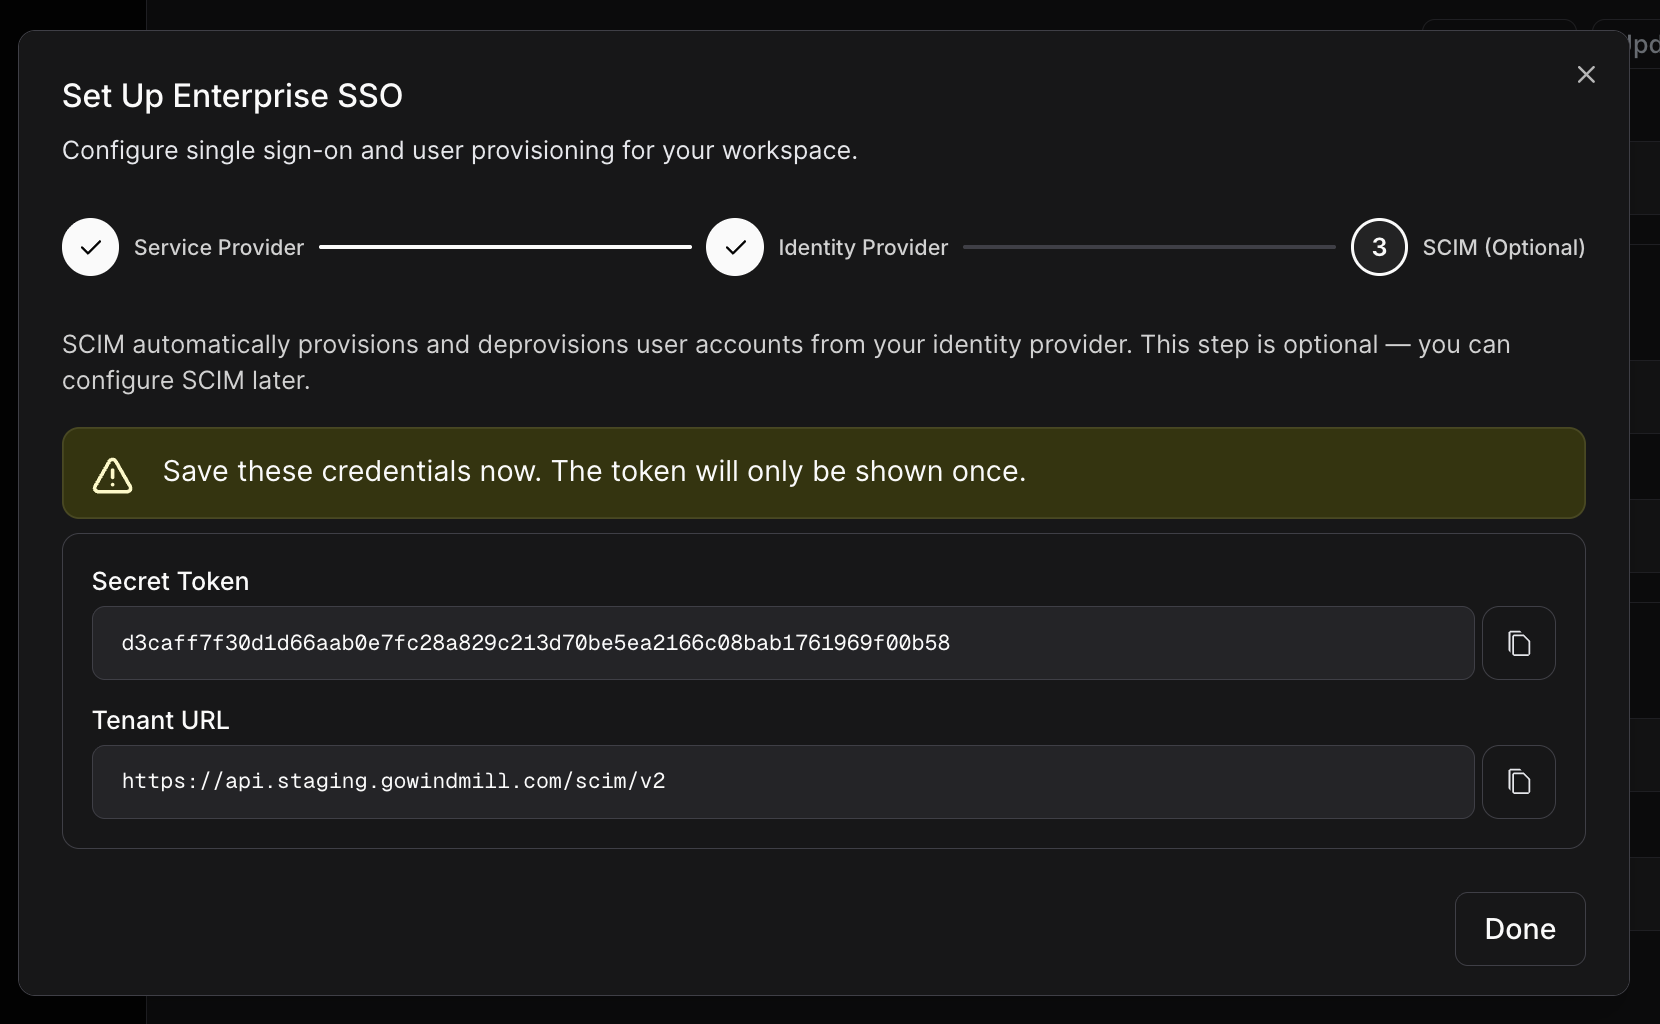
2
Configure your identity provider
Paste the SCIM Tenant URL and Secret Token into your identity provider’s SCIM provisioning settings.
3
Enable SCIM provisioning
After configuring your identity provider, return to Settings > Security and toggle Enable SCIM provisioning to start syncing users automatically.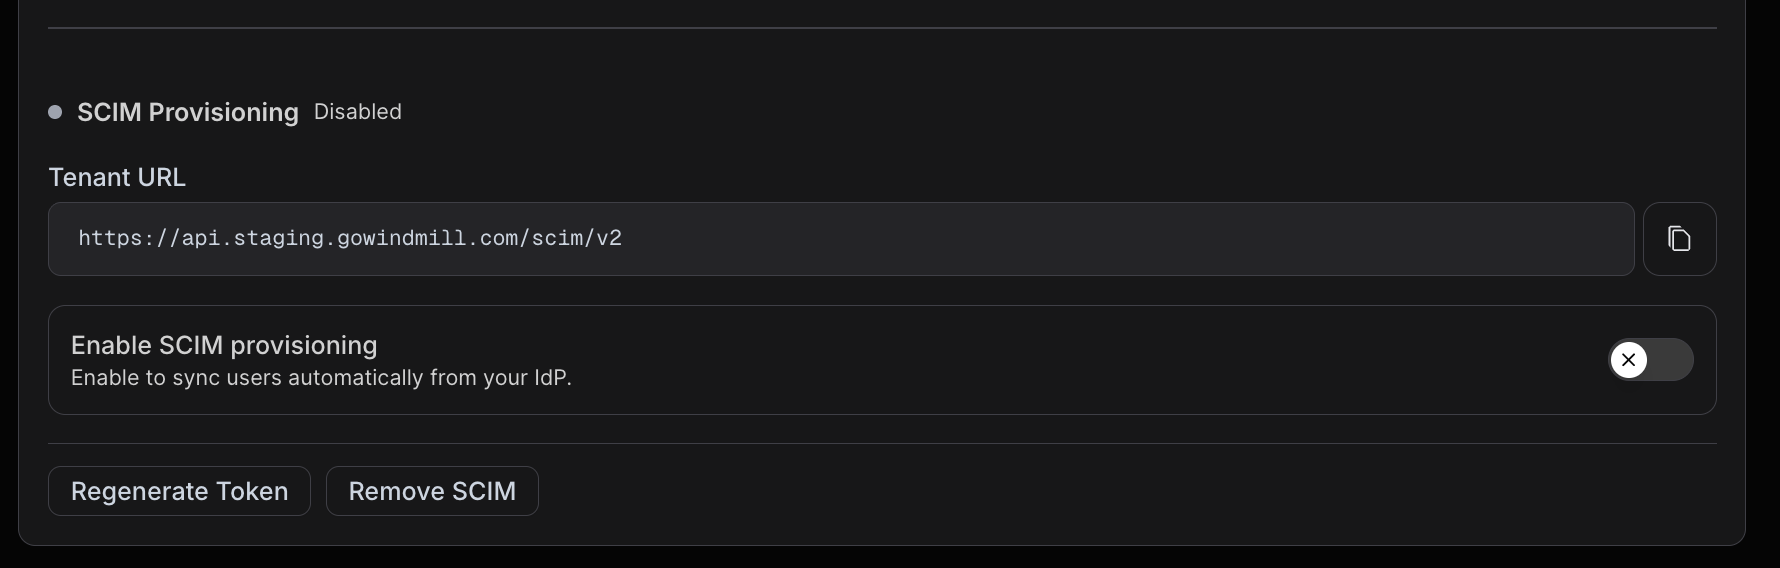
User provisioning
Users provisioned via SCIM are created as members in Windmill. Only first name and last name are synced from your identity provider—both are strongly recommended in your IdP’s attribute mappings.SCIM provisioning does not send invite emails or Slack messages. Users are created silently in Windmill—you’ll need to share access details with them through your own communication channels.
Group sync
Groups from your identity provider map directly to Windmill Groups. This lets you manage group membership at scale from your identity provider rather than manually in Windmill.Deprovisioning
When a user is removed from your identity provider, they’re archived in Windmill. All of their data—reviews, feedback, notes—is preserved. If the user has access to a different Windmill account, that access is unaffected.SAML attribute mappings
No custom attribute mapping is needed. Windmill only requires the NameID and recommends first and last name for a complete user profile.
Best practices
- Test SSO before activating. There’s no fallback if something goes wrong—verify the connection works with the Test button first.
- Copy the SCIM token immediately. It’s only displayed once. If you lose it, you’ll need to generate a new one and update your identity provider.
- Use SCIM groups to manage Windmill Groups. Managing group membership from your identity provider is easier than maintaining groups manually in Windmill.
- Don’t enable both Rippling and SCIM. They’re mutually exclusive. If you use Rippling for provisioning, continue using Rippling.
FAQs
I'm locked out after activating SSO. What do I do?
I'm locked out after activating SSO. What do I do?
Contact Windmill support at support@gowindmill.com to have SSO disabled for your account.
I lost my SCIM token. How do I get a new one?
I lost my SCIM token. How do I get a new one?
Generate a new token from Settings > Security. You’ll need to update the token in your identity provider’s SCIM configuration afterward.
Users aren't being created on first SSO login. What's wrong?
Users aren't being created on first SSO login. What's wrong?
Verify that your identity provider is sending the NameID attribute in the SAML assertion. Check your IdP’s attribute release settings to make sure the required attributes are included.
Do SCIM-provisioned users get an invite email or Slack message?
Do SCIM-provisioned users get an invite email or Slack message?
No. SCIM provisioning creates users in Windmill without sending an invitation email or Slack message. Notify provisioned users through your own communication channels so they know they have access.
If I connect Okta, do members automatically get invited or messaged?
If I connect Okta, do members automatically get invited or messaged?
No. Connecting Okta does not automatically invite everyone in the manual-invite sense. With Okta SAML SSO, members can be created when they first authenticate, but Windmill does not send invite emails or Slack messages just because they were created through SSO. With Okta SCIM provisioning, members can be created silently and do not receive invite emails or Slack messages. For manual invites, you can choose whether to send an email invite, a Slack message, or both.
I see a conflict error when enabling SCIM with Rippling connected.
I see a conflict error when enabling SCIM with Rippling connected.
SCIM and Rippling provisioning can’t be used together. Disconnect Rippling before enabling SCIM, or continue using Rippling to manage user access.